
NOCO Genius 1 Battery Charger Manual: A Comprehensive Guide
This manual serves as your personal tutor, guiding you through mastering your new NOCO Genius 1 charger, offering fundamental instructions for optimal battery care.
The NOCO Genius 1 is a compact, yet powerful, 6V and 12V battery charger designed for a wide range of battery types. This user-friendly device acts as a versatile solution for maintaining and restoring various lead-acid batteries, including flooded, AGM, and gel cell types.
It’s engineered to be exceptionally easy to use, functioning as a personal tutor to guide users through the charging process. The Genius 1 isn’t just a charger; it’s a comprehensive battery management system. It offers multiple charging modes – standard, boost, repair, and maintenance – to cater to different battery conditions and needs.
Its intelligent design incorporates safety features like reverse polarity protection and short-circuit protection, ensuring both battery and user safety. This manual will provide detailed instructions for safe and effective operation.
What’s in the Box: Package Contents
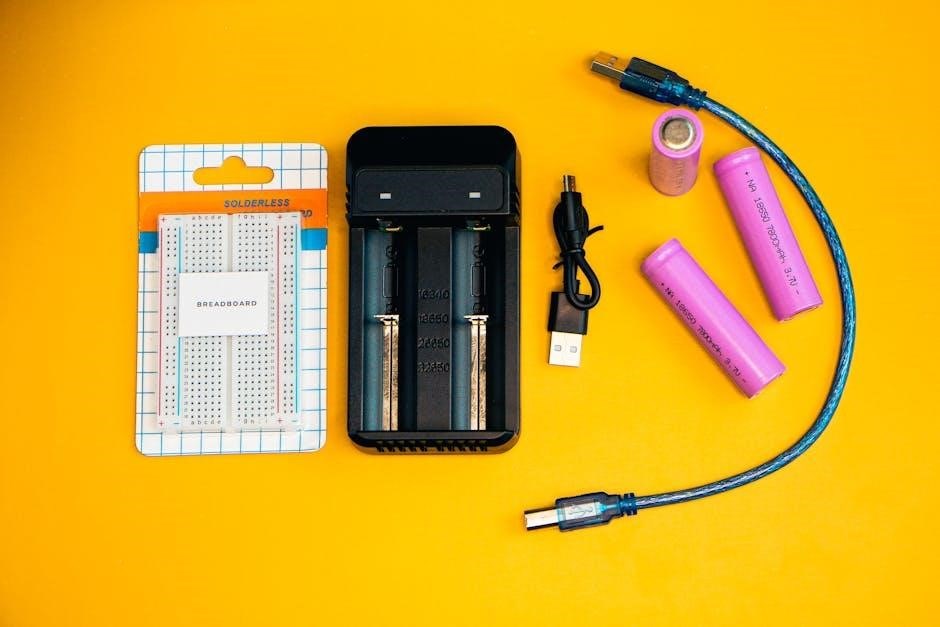
Upon opening your NOCO Genius 1 package, you should find the following components carefully included for immediate use. The box contains one NOCO Genius 1 battery charger unit, built for durability and performance. You’ll also receive a set of detachable battery clips – a red clip for the positive terminal and a black clip for the negative terminal – ensuring secure connections.
Additionally, the package includes a user manual, serving as your comprehensive guide to understanding and operating the charger effectively. Some packages may also contain eyelet connectors for a more permanent battery connection option. Please verify all listed items are present before proceeding.
If any components are missing or appear damaged, contact NOCO support immediately for assistance.
Safety Precautions and Warnings
Prior to using the NOCO Genius 1, carefully review these crucial safety precautions to prevent injury and ensure proper operation. Always charge batteries in a well-ventilated area, as charging can produce explosive gases. Never smoke or introduce sparks near the battery during charging.
Wear appropriate eye protection, such as safety glasses, to shield against potential acid splashes. Do not attempt to charge a frozen battery; thawing is required first. Ensure the charger is disconnected from the AC power source before making or breaking connections to the battery.
This charger is intended for charging lead-acid, AGM, and gel batteries only. Misuse could result in battery damage or personal harm.
Understanding Battery Types & Compatibility
The NOCO Genius 1 is designed to work with various battery chemistries, including lead-acid, AGM, and gel, offering versatile charging solutions for diverse needs.
Compatible Battery Types (Lead-Acid, AGM, Gel)
The NOCO Genius 1 excels in its broad compatibility with common battery types. Traditional Lead-Acid batteries, found in many vehicles and applications, are fully supported. Furthermore, it’s optimized for Absorbent Glass Mat (AGM) batteries, increasingly popular in powersports and demanding applications due to their spill-proof design and vibration resistance.
The charger also effectively manages Gel batteries, requiring a specific charging profile to prevent damage. The Genius 1 automatically detects the battery type, selecting the appropriate charging algorithm for optimal performance and longevity. This intelligent detection eliminates the guesswork, ensuring safe and efficient charging regardless of your battery’s chemistry. Always verify compatibility before connecting to avoid potential issues.
Voltage Compatibility (6V & 12V Batteries)
The NOCO Genius 1 demonstrates impressive versatility with its support for both 6-volt and 12-volt battery systems. This dual-voltage capability makes it ideal for a wide range of applications, from classic cars utilizing 6V systems to modern vehicles and powersports equipment running on 12V.
The charger intelligently detects the battery voltage upon connection, automatically adjusting its output to deliver the correct charging profile. No manual adjustments are needed, simplifying the charging process. This automatic detection ensures safe and efficient charging, preventing overcharging or undercharging regardless of the battery’s voltage. Confirm your battery’s voltage before connecting for optimal results.
Battery Capacity Ratings (Amp-Hours ─ Ah)
The NOCO Genius 1 is designed to effectively charge batteries with capacities ranging from 1.2 Amp-Hours (Ah) up to 32 Ah; This broad range covers many common battery sizes found in motorcycles, ATVs, lawnmowers, personal watercraft, and automobiles.
Understanding your battery’s Ah rating is crucial for selecting the appropriate charging current. While the Genius 1 automatically adjusts its output, knowing the Ah helps gauge charging time. Larger Ah batteries will naturally take longer to fully charge than smaller ones. The charger’s intelligent algorithm optimizes the charging process for each battery size within its supported range, ensuring efficient and safe operation.
Charging Modes Explained
The Genius 1 features multiple charging modes – Standard, Boost, Repair, and Maintenance – each tailored to specific battery conditions and recovery needs.
Standard Charging Mode
Standard charging is the default and most commonly used mode for fully discharging batteries. It’s ideal for batteries that are still accepting a charge, but require a full replenishment of power. This mode utilizes a multi-stage charging process, beginning with a soft start, followed by bulk charging, absorption, and finally, float charging.
The bulk charging stage rapidly restores the majority of the battery’s capacity. Absorption then tapers the charge current to maximize efficiency and prevent overcharging. Finally, float charging maintains the battery at 100% charge without damaging it. The Genius 1 automatically transitions between these stages, ensuring optimal charging performance and extending battery life. This mode is suitable for regular maintenance and keeping batteries topped off.
Boost Mode: Rapid Charging for Deeply Discharged Batteries
Boost mode delivers a higher voltage charge, designed for batteries that have been deeply discharged and may not accept a charge in standard mode. This mode bypasses the standard charging stages, delivering a maximum current to quickly restore some battery capacity.
However, it’s crucial to understand that Boost mode is not intended for continuous use. It should only be used for a limited time – typically a maximum of 15 minutes – to bring the battery up to a level where standard charging can take over. Prolonged use of Boost mode can potentially damage the battery. Once the battery accepts a charge, the Genius 1 will automatically revert to standard charging.
Repair Mode: Attempting to Recover Sulfated Batteries
Repair mode is a specialized charging process designed to attempt recovery of batteries that have suffered from sulfation – a buildup of lead sulfate crystals that reduces battery capacity and performance. This mode utilizes a high-frequency, low-voltage pulse to break down these sulfate crystals, potentially restoring some of the battery’s original capacity.
However, success isn’t guaranteed. Severely sulfated batteries may not be recoverable. Repair mode can take significantly longer than standard charging, potentially several hours or even days, depending on the battery’s condition. Monitor the charging process closely, and understand that this mode isn’t suitable for all battery types.
Maintenance Mode: Long-Term Battery Health
Maintenance mode, also known as float charging, is crucial for preserving battery health during periods of inactivity or infrequent use. Once a battery is fully charged, the Genius 1 automatically switches to maintenance mode, delivering a low, continuous charge to offset self-discharge.
This prevents the battery from returning to a discharged state, which can lead to sulfation and reduced lifespan. Maintenance mode is safe for long-term connection, allowing you to keep batteries topped off and ready for use. It’s ideal for seasonal vehicles, boats, or any battery not regularly utilized. Regularly checking connections remains important even in this mode.
Connecting the NOCO Genius 1
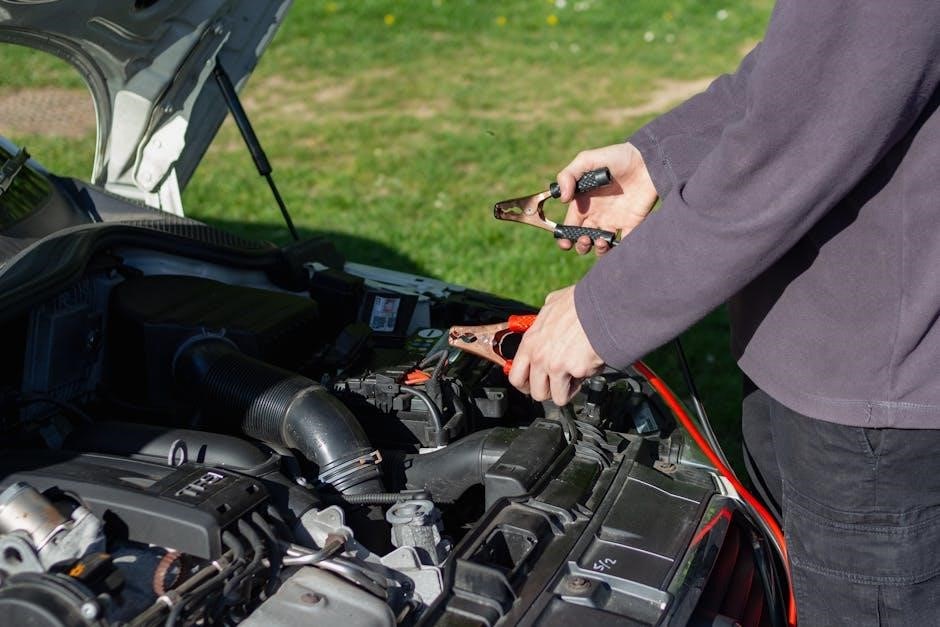
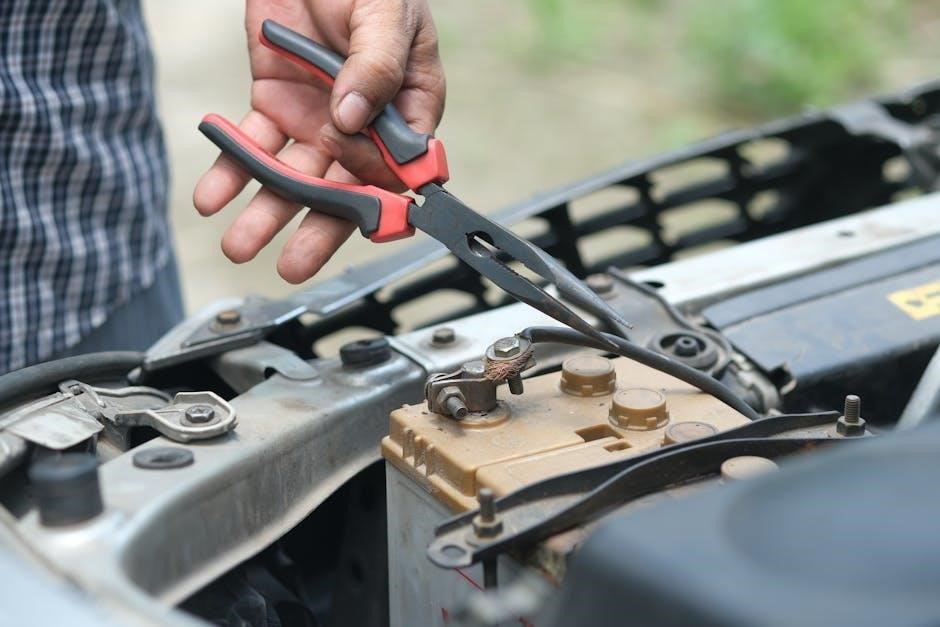
Establishing a secure connection is vital; ensure correct polarity – red to positive (+), black to negative (-). Clean contacts are essential for efficient charging.
Correct Polarity: Red to Positive (+), Black to Negative (-)
Connecting the NOCO Genius 1 with the correct polarity is absolutely crucial to prevent damage to both the charger and the battery. Always double-check before making any connections. The red clamp always connects to the positive (+) terminal of the battery, while the black clamp connects to the negative (-) terminal.
Reversing the polarity can cause a short circuit, potentially damaging the charger’s internal components and even leading to a hazardous situation, including sparks or battery explosion. Most modern chargers, including the Genius 1, feature reverse polarity protection, but relying on this feature alone is not recommended.
Carefully identify the positive and negative terminals on your battery. They are usually clearly marked. If unsure, consult your battery’s documentation or seek assistance from a qualified technician. A simple mistake can have costly consequences, so prioritize accuracy during this step.
Clip Connections: Secure and Clean Contact
Achieving a secure and clean connection with the included clips is vital for efficient charging. Ensure the clips firmly grip the battery terminals, making full metal-to-metal contact. Loose connections can interrupt the charging process and potentially cause arcing. Before attaching, inspect both the battery terminals and the clip surfaces for any corrosion or debris.
Clean any corrosion with a wire brush or a specialized battery terminal cleaner. A clean surface maximizes conductivity. When clamping, apply firm, even pressure. Avoid wiggling or twisting the clips after attachment. Regularly inspect the clip connections during the charging cycle to confirm they remain secure.
Damaged or worn clips should be replaced immediately to maintain optimal performance and safety. Proper clip connection ensures a stable and effective charge for your battery.
Eyelet Connections: Permanent Mounting Option
For a more permanent and convenient charging setup, consider utilizing eyelet connectors. These allow for a fixed connection to the battery, eliminating the need to repeatedly clamp and unclamp clips. To install, securely crimp the eyelets onto the battery terminals, ensuring a strong and lasting bond; This method is particularly useful for batteries in vehicles or equipment that require frequent charging;
When using eyelets, always double-check the polarity before connecting the charger. Incorrect polarity can damage both the charger and the battery. Regularly inspect the eyelet connections for corrosion or loosening.
Properly installed eyelets provide a reliable and hassle-free charging experience, simplifying battery maintenance over time.
Using the NOCO Genius 1: Step-by-Step Instructions
Begin with a battery assessment, connect the charger with correct polarity, and monitor the LED indicators to track the charging process effectively.
Initial Setup and Battery Assessment
Before initiating the charging process, a thorough battery assessment is crucial for optimal results and safety. Begin by visually inspecting the battery for any physical damage, such as cracks or leaks. Ensure the battery terminals are clean and free from corrosion; use a wire brush if necessary.
Next, verify the battery’s voltage using a multimeter. A healthy 12V battery should read approximately 12.6 volts or higher. If the voltage is significantly lower, it indicates a deeply discharged battery requiring a slower charging approach, potentially utilizing the Boost or Repair modes.
Confirm the battery type (Lead-Acid, AGM, or Gel) to select the appropriate charging mode on the Genius 1. Incorrect mode selection can lead to reduced battery life or even damage. Finally, determine the battery’s Amp-Hour (Ah) rating, as this information is helpful for understanding charging times;
Monitoring the Charging Process (LED Indicators)
The NOCO Genius 1 utilizes a multi-color LED indicator system to clearly communicate the charging status. A red LED signifies charging is in progress, indicating the battery is receiving power and being replenished. A green LED signals that the battery is fully charged and ready for use, or that maintenance mode is active.
A blinking red light often indicates a problem, such as reversed polarity or a faulty battery. If this occurs, immediately disconnect the charger and review the safety precautions. A blinking green light suggests a desulfation process is underway during Repair mode.
Pay close attention to these indicators throughout the charging cycle to ensure proper operation and identify any potential issues promptly. Consistent monitoring allows for informed adjustments and maximizes battery health.
Troubleshooting Common Charging Issues
If the Genius 1 doesn’t initiate charging, first verify the connections – ensure correct polarity (red to positive, black to negative) and secure contact. A blinking red LED often indicates reversed polarity; disconnect immediately and correct the connection.
For deeply discharged batteries, try Boost mode, but limit its use to avoid damage. If the charger cycles rapidly between charging and maintenance, the battery may be sulfated; attempt Repair mode.
If the battery fails to hold a charge, it may be beyond recovery and require replacement. Always consult the safety precautions before attempting any troubleshooting steps. A faulty charger is also a possibility; contact NOCO support if issues persist;
Advanced Features & Considerations
Explore temperature compensation, desulfation technology, and reverse polarity protection for optimized charging and extended battery life with your NOCO Genius 1.
Temperature Compensation
The NOCO Genius 1 incorporates intelligent temperature compensation, a crucial feature for maintaining optimal charging performance in varying environmental conditions. Battery charging efficiency is significantly affected by temperature; colder temperatures reduce battery capacity and slow down chemical reactions, while warmer temperatures can accelerate them and potentially damage the battery.
This charger automatically adjusts the charging voltage based on the ambient temperature, ensuring a safe and effective charge regardless of the climate. It prevents overcharging in hot weather and undercharging in cold weather, maximizing battery lifespan and performance. The temperature sensor continuously monitors the surrounding temperature and modifies the charging algorithm accordingly, providing a truly adaptive charging solution. This feature is particularly beneficial for batteries used in vehicles stored outdoors or in unheated garages.
Desulfation Technology Explained
The NOCO Genius 1 utilizes advanced desulfation technology, a process designed to recover batteries that have suffered from sulfation – a buildup of lead sulfate crystals that reduces battery capacity and performance. Over time, especially with infrequent use, sulfate crystals accumulate on the battery plates, hindering their ability to accept and deliver charge.
This charger employs a high-frequency, low-voltage pulse to break down these sulfate crystals, restoring the battery’s original capacity and extending its lifespan. While not all sulfated batteries are recoverable, the Genius 1’s desulfation mode offers a chance to revitalize batteries that would otherwise be discarded. It’s important to note that the success of desulfation depends on the severity of the sulfation and the overall condition of the battery.
Reverse Polarity Protection
The NOCO Genius 1 is equipped with built-in reverse polarity protection, a crucial safety feature designed to prevent damage to both the charger and the battery. Accidental connection of the charger clamps to the incorrect terminals (positive to negative, and vice versa) can cause a short circuit and potentially dangerous situations.
This protection mechanism automatically detects a reverse polarity connection and disables the charging process, preventing sparks, overheating, and potential harm. The charger’s LED indicators will typically signal an error condition when reverse polarity is detected. However, relying solely on this protection is not advised; always double-check the polarity before connecting the charger. It’s a safeguard, not a substitute for careful connection.

Maintenance and Storage
Keep the charger and cables clean for optimal performance. Store in a cool, dry place when not in use, protecting it from extreme temperatures and humidity.
Cleaning the Charger and Cables
Regular cleaning ensures the longevity and efficient operation of your NOCO Genius 1. Before cleaning, always disconnect the charger from the power outlet. Use a damp cloth – not soaking wet – to wipe down the charger’s casing, removing any dirt or debris.
For the cables and clamps, inspect them for corrosion. If present, gently clean the clamps with a wire brush or sandpaper to restore a good connection. Avoid using harsh chemicals or abrasive cleaners, as these can damage the components.
Ensure the charger and cables are completely dry before reconnecting and using. Periodic inspection and cleaning will help maintain optimal charging performance and prevent potential issues.
Proper Storage Conditions
When not in use, store your NOCO Genius 1 in a cool, dry environment. Avoid locations exposed to extreme temperatures, humidity, or direct sunlight, as these can degrade the charger’s internal components and shorten its lifespan.
Ideally, store the charger indoors, such as in a garage, shed, or basement. Ensure the storage area is free from dust and debris. It’s beneficial to loosely coil the cables to prevent kinks or damage.
Do not store the charger on top of batteries or near flammable materials. Proper storage will help maintain the charger’s functionality and ensure it’s ready for use when needed.
Warranty Information and Support
NOCO Genius 1 chargers are backed by a limited warranty, typically covering defects in materials and workmanship. The standard warranty period is often 3 years from the date of purchase, but it’s crucial to verify the specific terms with your retailer or NOCO directly.
To make a warranty claim, retain your proof of purchase and contact NOCO’s customer support team. They may require you to return the charger for inspection.
For technical support, troubleshooting assistance, or to access frequently asked questions, visit the official NOCO website. You can also reach their support team via email or phone; details are available on their website.