
Air Innovations Humidifier Instruction Manual: A Comprehensive Guide
This manual details setup, operation, maintenance, and troubleshooting for Air Innovations humidifiers, including models MH-325, MH-408, MH-703, and HUMID10-BLUE.
Welcome to the world of enhanced comfort and well-being with your new Air Innovations humidifier! These humidifiers utilize advanced ultrasonic technology to deliver a consistent and soothing mist, improving air quality within your home. Air Innovations offers a diverse range of models, including the MH-325, MH-408, MH-703, and the HUMID10-BLUE, each designed with user-friendliness and efficiency in mind.
This instruction manual serves as a comprehensive guide, providing detailed instructions on everything from initial setup and daily operation to essential maintenance procedures. Whether you’ve chosen a Clean Mist Top-Fill SensaTouch model or another variation, this guide will ensure optimal performance and longevity of your humidifier. Explore features like adjustable mist output, convenient remote control operation, and the relaxing night light functionality.
Understanding Ultrasonic Technology
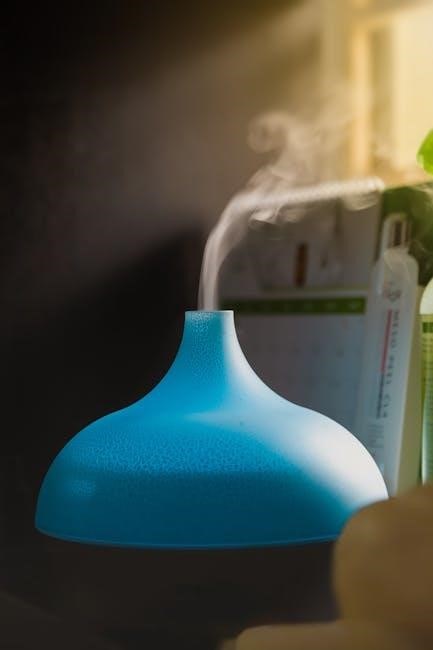
Air Innovations humidifiers employ cutting-edge ultrasonic technology to create a fine, cool mist without the use of heat or moving parts. This process involves a transducer vibrating at a high frequency – essentially, it breaks down water into microscopic droplets. These droplets are then released into the air as a visible mist, increasing humidity levels silently and efficiently.
Unlike traditional humidifiers, ultrasonic models consume less energy and operate quietly, making them ideal for bedrooms, nurseries, or any space where peacefulness is desired. The absence of a heating element also eliminates the risk of burns. It’s crucial to use distilled or demineralized water to prevent mineral buildup on the transducer, ensuring optimal performance and extending the humidifier’s lifespan. Avoid using harsh chemicals or abrasive cleaners near the ultrasonic nebulizer.

Setting Up Your Air Innovations Humidifier
Proper setup involves unboxing components, carefully filling the water tank with distilled water, and then connecting the humidifier to a power source.
Unboxing and Component Identification
Upon opening your Air Innovations humidifier package, carefully inspect all included components. You should find the humidifier base, the water tank (often removable for easy filling), and potentially a remote control. Verify the presence of the instruction manual and any included warranty information.
Ensure all parts are present and undamaged. The humidifier utilizes ultrasonic technology, so handle the transducer with care. Some models may include an aroma tray for essential oils. Familiarize yourself with each component’s purpose before proceeding. Retain the original packaging for potential warranty claims or future storage. A quick inventory ensures a smooth setup process and helps identify any missing parts immediately.
Filling the Water Tank
Before operating your Air Innovations humidifier, carefully fill the water tank with clean, cool water. Distilled or demineralized water is recommended to minimize mineral buildup and prolong the humidifier’s lifespan. Avoid using hot water, as it can damage the unit.
Ensure the tank is securely placed on the base before powering on the device. Do not overfill the tank beyond the maximum fill line indicated. For top-fill models, simply remove the lid and pour water directly into the tank. Always unplug the humidifier before handling the water tank for filling or cleaning. Proper water usage is crucial for optimal performance and safety.
Powering On and Initial Operation
After filling the water tank and ensuring it’s properly seated, plug the Air Innovations humidifier into a standard 110-120V power outlet. The power button will initiate the ultrasonic technology, creating a visible mist. Initial operation may take a few minutes to reach the desired humidity level.
Utilize the remote control (if included) to adjust settings or manually operate the power button on the unit. Observe the mist output to confirm proper function. Avoid directing the mist towards walls or appliances. Allow the humidifier to run for several hours to fully humidify the room.

Operation and Features
Explore adjustable mist levels, remote control functionality, a convenient night light, and the aroma tray for essential oils—enhancing your humidifying experience.
Adjusting Mist Output Levels
Air Innovations humidifiers offer variable mist output to customize humidity levels to your comfort. Typically, controls allow you to cycle through low, medium, and high settings. Lower settings conserve water and are ideal for smaller rooms or less dry conditions.
Higher settings provide maximum humidification for larger spaces or when quicker relief from dryness is desired. Some models feature a continuous mode for uninterrupted operation, while others include an auto mode that adjusts output based on ambient humidity.
Experiment with different settings to find the optimal balance between humidity and energy efficiency. Regularly monitor room humidity using a hygrometer to ensure levels remain within the recommended range of 30-50% for optimal health and comfort.
Using the Remote Control
Your Air Innovations humidifier may include a remote control for convenient operation from a distance. The remote typically mirrors the functions available on the unit’s control panel, allowing you to adjust mist output levels (low, medium, high), power the humidifier on or off, and activate the night light.
Some remotes also control timer settings and other specialized features. Ensure the remote is pointed directly at the humidifier’s sensor for reliable communication. Replace the batteries when the remote’s responsiveness diminishes.
Keep the remote in a safe, dry location to prevent damage. Refer to your specific model’s documentation for a detailed explanation of all remote control functions and their corresponding buttons. Proper use enhances user convenience and control over your humidifier’s performance.
Night Light Functionality
Many Air Innovations humidifiers feature a built-in night light, offering a gentle glow for added convenience, especially in bedrooms or nurseries. This feature is typically activated via a dedicated button on the unit itself or through the remote control. The night light often cycles through different colors or offers a static color option.
The intensity of the night light may also be adjustable on certain models, allowing you to customize the brightness to your preference. This soft illumination can be particularly helpful for individuals sensitive to darkness or for providing a calming ambiance.
Refer to your model’s specific instructions for details on controlling the night light’s color, brightness, and on/off functionality.
Aroma Tray Usage
Certain Air Innovations humidifier models include an aroma tray designed for use with essential oils, allowing you to diffuse fragrances while humidifying the air. This tray is typically located on the unit’s base or side and is easily accessible for adding oils.
To use the aroma tray, simply add a few drops of your preferred essential oil directly onto the pad within the tray – do not pour oil directly into the water tank. The humidifier’s mist will then carry the scent throughout the room.
Always use pure essential oils and avoid using excessive amounts, as this could potentially damage the unit. Clean the aroma tray regularly to prevent buildup and maintain optimal performance.

Maintenance and Cleaning
Regular cleaning ensures optimal performance and longevity of your Air Innovations humidifier; daily, deep cleaning, transducer care, and descaling are crucial.
Daily Cleaning Procedures
To maintain peak performance and hygiene, daily cleaning is essential. After each use, disconnect the humidifier from the power source. Empty any remaining water from the tank and the base. Rinse the water tank thoroughly with clean, cool tap water, ensuring all residue is removed. Gently wipe down the interior surfaces of both the tank and base with a soft, dry cloth.
Pay particular attention to the area around the transducer, avoiding any harsh scrubbing. Do not use abrasive cleaners or detergents, as these can damage the unit. Allow all components to air dry completely before reassembling and storing. Consistent daily rinsing prevents mineral buildup and bacterial growth, contributing to a healthier and more efficient humidifying experience. This simple routine extends the life of your Air Innovations humidifier.
Deep Cleaning Instructions
For a thorough clean, perform a deep cleaning weekly, or bi-weekly depending on water hardness. First, disconnect and empty the humidifier. Fill the tank with clean water and add two tablespoons of white vinegar. Let this solution sit for 30-60 minutes to loosen mineral deposits. After soaking, empty the tank and use a soft brush to gently scrub the interior surfaces, including the transducer area.
Rinse thoroughly with clean water until the vinegar scent is gone. Wipe down the base with a damp cloth. Never immerse the base in water. Ensure all parts are completely dry before reassembling. This deep cleaning process helps prevent scale buildup and maintains optimal humidifier function, ensuring clean and healthy mist output.
How to Clear Air Innovations MH-408 Humidifier
The MH-408 requires regular cleaning to prevent mineral buildup and maintain optimal performance. Begin by disconnecting the unit and emptying any remaining water. Prepare a cleaning solution of equal parts white vinegar and water. Pour this solution into the water tank, ensuring it covers the transducer. Allow the solution to sit for at least 30 minutes, or up to an hour for heavier buildup.
After soaking, gently shake the tank to loosen deposits. Empty the solution and use a soft cloth or brush to wipe down the tank’s interior. Rinse thoroughly with clean water until the vinegar smell is gone. Repeat if necessary. Proper cleaning ensures efficient operation and extends the life of your MH-408 humidifier.
Cleaning the Transducer
The transducer is the heart of your ultrasonic humidifier, responsible for creating the mist. Regular cleaning is crucial for maintaining its efficiency. After disconnecting the unit, carefully remove the transducer according to your model’s instructions. Gently wipe the transducer’s surface with a soft cloth dampened with white vinegar or a mild cleaning solution.
Avoid using harsh chemicals or abrasive materials, as these can damage the delicate surface. Inspect for any mineral buildup and carefully remove it. Rinse the transducer thoroughly with clean water and ensure it is completely dry before reinstalling. A clean transducer ensures optimal mist output and prevents operational issues.
Descaling the Humidifier
Over time, mineral deposits can accumulate inside your Air Innovations humidifier, reducing its efficiency and lifespan. Descaling removes these deposits. Begin by unplugging the unit. Prepare a descaling solution using equal parts white vinegar and water – approximately 4.1 liters total, depending on tank size.
Pour the solution into the water tank and let it sit for at least 30 minutes, or longer for heavy buildup. Afterwards, empty the tank and rinse it thoroughly with clean water several times. Run the humidifier with fresh water for an hour to flush out any remaining vinegar residue. Repeat if necessary.
Troubleshooting Common Issues
This section addresses problems like the humidifier not powering on, low mist output, unusual noises, and water leaks, offering solutions for optimal performance.
Humidifier Not Turning On
If your Air Innovations humidifier fails to power on, first verify the power cord is securely plugged into both the unit and a functioning electrical outlet. Ensure the outlet is receiving power by testing it with another device. Next, check if the water tank is properly seated and filled to the minimum water level – the unit won’t operate without sufficient water.
Inspect the power adapter for any visible damage; a faulty adapter may prevent operation. If using a remote control, confirm the batteries are fresh and correctly installed. Some models feature a power switch located on the base; ensure it’s in the ‘on’ position. If the issue persists, consult the full instruction manual (IM0040A) for model-specific troubleshooting steps, or contact customer support for assistance.
Low Mist Output
Experiencing low mist output with your Air Innovations humidifier often indicates mineral buildup affecting the transducer. Descaling the unit regularly, as detailed in the maintenance section, is crucial. Ensure the mist output level is set to your desired intensity using the control panel or remote. Check the water tank for proper filling; insufficient water restricts mist production.
Also, verify the air intake vents are unobstructed, allowing for proper airflow. A dirty transducer can significantly reduce mist; cleaning it gently with a soft cloth is recommended. If using tap water, mineral content can quickly diminish output – distilled water is preferred. Refer to your model’s manual (MH-703, HUMID10-BLUE) for specific guidance, and consider contacting support if the problem continues.
Unusual Noises
If your Air Innovations humidifier is producing unusual noises, first ensure it’s placed on a level surface to prevent vibrations. A gurgling sound often indicates air trapped within the unit; gently tilting it can release the air. Rattling noises may stem from loose components – inspect the water tank and base for secure fitting. Verify nothing is obstructing the fan or transducer, as this can cause whirring or clicking sounds.
Mineral buildup can also contribute to noise; regular descaling is vital. Avoid using harsh chemicals during cleaning, as they might damage internal parts. Consult the manual for your specific model (MH-325, MH-408, HUMID10-BLUE) for detailed troubleshooting steps. If the noise persists, contact customer support for assistance.
Water Leaks
Discovering water leaks from your Air Innovations humidifier requires immediate attention. First, confirm the water tank is correctly seated and sealed onto the base; improper alignment is a common cause. Inspect the tank for cracks or damage, especially around the fill opening. Ensure you haven’t overfilled the tank, exceeding the maximum water level indicated.
Check the base for any visible cracks or damage that could be contributing to the leak. If leaks persist, thoroughly clean the sealing surfaces of both the tank and base. Refer to your model’s specific instructions (MH-325, MH-408, HUMID10-BLUE) for detailed diagrams. If the problem continues, discontinue use and contact customer support.

Safety Precautions
Always follow warnings regarding water usage and avoid directing mist at appliances. Do not use harsh objects on the nebulizer, and ensure proper ventilation.
Warnings and Cautions
Please read all instructions carefully before operating your Air Innovations humidifier. To prevent electrical shock, never immerse the base in water. Do not operate the unit with a damaged cord or plug. Always unplug the humidifier before cleaning or filling.
Never direct the mist output towards walls, furniture, or electrical appliances to avoid potential damage from moisture. Avoid using water that is excessively hot or cold, as this can affect performance. Do not add any substances to the water other than clean, distilled water.
Keep the humidifier out of reach of children and pets. Supervise its use around young children. Do not attempt to repair the unit yourself; contact customer support for assistance. Ensure the humidifier is placed on a stable, level surface to prevent tipping.
Proper Water Usage
Utilizing the correct water type is crucial for optimal performance and longevity of your Air Innovations humidifier. Always use distilled or demineralized water to minimize mineral buildup and prevent white dust emission. Tap water and bottled water often contain minerals that can clog the transducer and reduce mist output.
Regularly emptying and refilling the water tank is recommended, even if the humidifier hasn’t run dry, to prevent stagnation and bacterial growth. Do not overfill the tank beyond the maximum fill line indicated.
Avoid adding any chemicals, essential oils (unless using the aroma tray), or other substances to the water as they can damage the unit and void the warranty. Clean the water tank thoroughly with each refill to maintain hygiene.
Avoiding Damage to the Unit
To ensure the longevity of your Air Innovations humidifier, avoid directing the mist output towards walls or electronic appliances. Moisture can cause damage to surfaces and potentially create electrical hazards. Never attempt to disassemble or repair the unit yourself; this will void the warranty.
Do not insert any objects into the humidifier’s base or water tank, as this could damage the transducer or other internal components. Always unplug the humidifier before cleaning or performing maintenance.
Handle the unit with care and avoid dropping it, as this can cause internal damage. Ensure the humidifier is placed on a stable, level surface to prevent tipping and potential water leaks.
Model-Specific Instructions
Detailed guidance is available for MH-325 setup, MH-703 manual downloads, and HUMID10-BLUE use and care, ensuring optimal performance for each model.
Air Innovations MH-325 Setup
Preparing your Air Innovations MH-325 humidifier for use is a straightforward process. Begin by carefully unboxing the unit and identifying all components. Locate the water tank and, before filling, ensure the humidifier is placed on a stable, level surface.
Fill the tank with cool, clean water – distilled or demineralized water is recommended to minimize mineral buildup. Securely attach the tank to the base. Connect the power adapter to a standard 110-120V outlet. Upon initial power-up, the MH-325 will undergo a self-check.
Utilize the control panel or included remote to adjust mist output levels to your desired comfort. Familiarize yourself with the night light functionality and the aroma tray for optional aromatherapy. Regular cleaning, as outlined in the maintenance section, will prolong the life and efficiency of your MH-325.
MH-703 Manual Download
Accessing the complete instruction manual for your Air Innovations MH-703 humidifier is simple and convenient. A downloadable PDF version, approximately 3.5 MB in size, is readily available online. This comprehensive guide provides detailed instructions on all aspects of the MH-703’s operation, from initial setup and feature utilization to routine maintenance and troubleshooting.
The manual covers topics such as filling the water tank, adjusting mist output, utilizing the remote control, and understanding the night light functionality. It also includes crucial safety precautions and warranty information.
To download the MH-703 manual, simply click the provided link. Keeping this manual handy ensures optimal performance and longevity of your humidifier. Refer to it regularly for guidance and support.
HUMID10-BLUE Use and Care
The Air Innovations HUMID10-BLUE humidifier’s use and care manual, spanning 12 pages, offers essential guidance for optimal performance. This document details everything from initial setup and daily operation to thorough cleaning and long-term maintenance procedures. It’s designed to help you maximize the benefits of your ultrasonic humidifier.
Users will find clear instructions on filling the water tank, adjusting mist levels, and utilizing the aroma tray for aromatherapy. The manual also emphasizes proper water usage and safety precautions to ensure safe and efficient operation.
Download the free PDF manual to learn about features and maintain your humidifier effectively, ensuring years of reliable use.

Warranty Information
This section outlines warranty coverage details for your Air Innovations humidifier and provides clear instructions on how to contact customer support for assistance.
Warranty Coverage Details
Air Innovations provides a warranty against defects in materials and workmanship for a specified period from the date of original purchase. This warranty covers components that fail during normal household use. Proof of purchase is required to make a warranty claim. The warranty does not cover damage resulting from misuse, abuse, accidents, unauthorized repairs, or failure to follow the instructions outlined in this manual.
Specifically, the warranty excludes issues caused by improper water usage (like hard water without descaling) or damage from directing mist towards walls or appliances. Any attempts to repair the unit yourself will void the warranty. For complete details regarding the length of coverage and specific exclusions, please refer to the separate warranty card included with your humidifier or contact Air Innovations customer support directly.
Contacting Customer Support
For assistance with your Air Innovations humidifier, or to submit a warranty claim, our dedicated customer support team is readily available. We encourage you to first consult this instruction manual and the troubleshooting section for common issues. If you require further help, please gather your model number and date of purchase before contacting us.
You can reach our support team through several channels: visit the official Air Innovations website for FAQs and contact forms, or call our toll-free number (details available on the website). Please note response times may vary depending on contact method and volume. We are committed to providing prompt and helpful assistance to ensure your satisfaction with your Air Innovations product.