
Nexgrill Instructions: A Comprehensive Guide
Welcome to the ultimate resource for your Nexgrill! This guide covers assembly, operation, maintenance, and troubleshooting for a fantastic grilling experience.
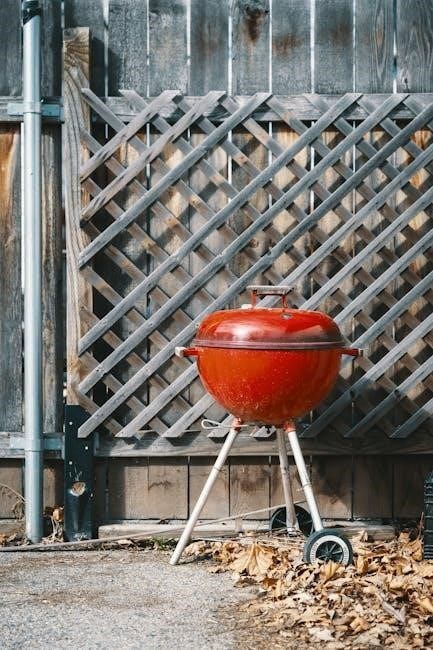
Nexgrill has rapidly become a trusted name in outdoor cooking, offering a diverse range of gas grills designed for various lifestyles and budgets. From compact 2-burner models perfect for small patios to expansive 6-burner stainless steel grills equipped with searing side burners and rotisserie kits, Nexgrill caters to every grilling enthusiast.

Their commitment lies in delivering quality, performance, and value, making backyard barbecues accessible to all. Nexgrill’s product line includes not only traditional gas grills but also innovative flat-top griddles and portable tabletop options, expanding cooking possibilities beyond the typical grill fare. Explore a world of flavor with Nexgrill’s accessories and tools!
Understanding Nexgrill Models
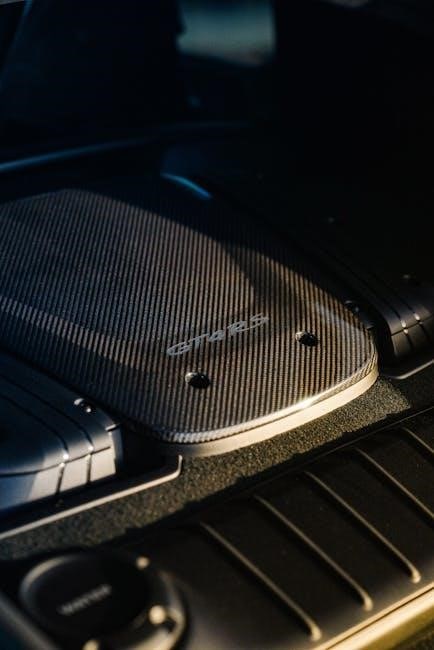
Nexgrill offers a broad spectrum of grills, each designed with specific features. The Gourmet Pro series boasts stainless steel construction and advanced features like searing side burners. The Daytona line provides reliable performance at a more accessible price point, including propane and flat-top griddle options.
Consider your cooking needs: a 3-burner grill suits smaller families, while a 6-burner is ideal for larger gatherings. Portable tabletop grills are perfect for camping or limited spaces. Pay attention to features like flame tamers (angled stainless steel models prevent flare-ups) and grease management systems for ease of cleaning.
Safety Precautions Before Assembly
Prioritize safety! Before assembling your Nexgrill, ensure a well-ventilated, level outdoor space, free from flammable materials. Carefully read the entire assembly manual – it’s crucial for proper construction and safe operation.
Inspect all parts for damage during unboxing. Never modify the grill in any way. Keep children and pets away from the assembly area. When connecting the propane tank, always check for leaks using a soapy water solution – never use a flame. Be mindful of sharp edges during assembly and wear appropriate gloves.
Assembly Instructions
Let’s build your grill! Follow these step-by-step instructions, starting with unboxing and parts identification, then progressing through cart, burner, and tank connections.
Unboxing and Parts Inventory
Carefully unpack your new Nexgrill, ensuring you have ample space to avoid damaging any components. Once unboxed, cross-reference all parts with the detailed parts list included in your assembly manual – often available for download online.
This manual, like the Assembly Manual_Nexgrill 5-Burner Gas Grill_720-0958A, is crucial. Verify you have the grill cart pieces, burner assemblies, flame tamers, cooking grates, the grease management system, side burner components (if applicable), and all necessary hardware like screws and bolts.
Missing parts? Contact Nexgrill Customer Support immediately. Don’t proceed with assembly until you’ve confirmed a complete inventory, preventing frustration later. A thorough check now saves time and ensures a safe, functional grill.
Assembling the Grill Cart
Begin by laying out all cart components on a protected surface to prevent scratches. Following the assembly manual – referencing documents like Assembly Manual_Nexgrill 5-Burner Gas Grill_720-0958A – attach the legs to the base frame using the provided hardware.
Ensure all connections are snug but avoid over-tightening, which could strip the threads. Next, install any side shelves or cabinets, again carefully following the diagram.
Pay close attention to the orientation of each piece; incorrect assembly can lead to instability. Once the cart is fully assembled, verify its stability before proceeding. A solid cart foundation is essential for safe and enjoyable grilling.
Installing the Burners
Carefully position the burners onto the designated mounting brackets within the grill’s firebox. Ensure each burner tube aligns correctly with the gas valve openings – referencing your specific model’s manual is crucial. Secure the burners using the provided screws or clips, ensuring a tight and stable fit.
Inspect the burner ports for any obstructions; clear any debris to guarantee even gas flow.
Proper burner installation is vital for consistent heating and preventing uneven cooking. Double-check all connections before proceeding to the next step, prioritizing safety and optimal performance. A correctly installed burner system is the heart of your Nexgrill.
Connecting the Propane Tank
Before connecting, thoroughly inspect the propane tank valve for any damage or corrosion. Ensure the grill’s gas control knob is in the “OFF” position. Carefully screw the regulator onto the propane tank valve, hand-tightening only – avoid using tools.
Perform a leak test by applying a soapy water solution to the connection.
Bubbles indicate a leak; immediately disconnect and re-tighten. Never use a flame to check for leaks! A secure connection is paramount for safe operation. Always follow the manufacturer’s instructions and prioritize safety when handling propane.

Attaching the Side Burner (if applicable)
If your Nexgrill model includes a side burner, carefully align it with the designated mounting points on the grill cart. Securely fasten the side burner using the provided screws and bolts, ensuring a snug fit. Connect the side burner’s gas supply line to the corresponding valve on the main grill body.
Again, perform a thorough leak test with soapy water after connecting the gas line. Verify proper ignition of the side burner before use.
The side burner expands your cooking options, perfect for sauces or side dishes!
Installing the Grease Management System
Proper grease management is crucial for safe and enjoyable grilling. Locate the grease tray and mounting brackets. Slide the grease tray into its designated slot beneath the grill grates and burners. Ensure it’s securely positioned to catch drippings.
Attach the grease cup or container to the end of the grease channel. Regularly emptying this container prevents flare-ups and maintains optimal grill performance.
A clean grease management system contributes to a cleaner, safer, and more flavorful grilling experience!

Operating Your Nexgrill
Get ready to grill! This section details the initial burn-in, lighting procedures, heat adjustments, and maximizing your Nexgrill’s performance for delicious results.
Initial Burn-In Procedure
Before your first culinary adventure, a crucial step is the initial burn-in. This process prepares your Nexgrill for optimal performance and longevity. Upon assembly, and before cooking any food, fully open the grill lid. Turn all burners to the highest setting for approximately 15-20 minutes;
This extended high-heat exposure serves several vital purposes. It burns off any residual manufacturing oils or coatings present on the burners and internal components. You may notice a slight odor during this phase – this is normal and will dissipate. The burn-in also helps to season the grates, creating a natural, non-stick surface.
Ensure adequate ventilation during this process. After the burn-in, allow the grill to cool completely before proceeding with your first cookout. This initial step ensures a safe and flavorful grilling experience.
Lighting the Grill
Properly lighting your Nexgrill is essential for safe and efficient operation. First, ensure the grill lid is open. Then, fully open the propane tank valve. Next, turn one burner control knob to the “High” position and immediately press the igniter button. You should hear a clicking sound and see a visible flame.
If the grill doesn’t light after several attempts, turn off the burner and tank valve. Wait five minutes to allow any accumulated gas to dissipate before trying again. Alternatively, you can manually light the grill using a long-handled lighter placed near the burner, following the grill’s specific instructions.
Once lit, gradually light additional burners as needed. Always observe the flame pattern to ensure consistent and even ignition.
Adjusting Heat Settings
Controlling the heat is crucial for successful grilling. Nexgrill grills feature burner control knobs allowing precise temperature adjustments. Turning the knobs clockwise increases the flame and heat, while turning them counterclockwise decreases it. Start with a lower setting and gradually increase as needed to avoid overcooking.
Different foods require different heat levels – searing steaks demands high heat, while delicate fish benefits from medium-low. Utilize the grill’s temperature gauge (if equipped) to monitor internal temperature. Remember that preheating the grill ensures even cooking.
Experiment with burner combinations to create zones of varying heat for versatile cooking.
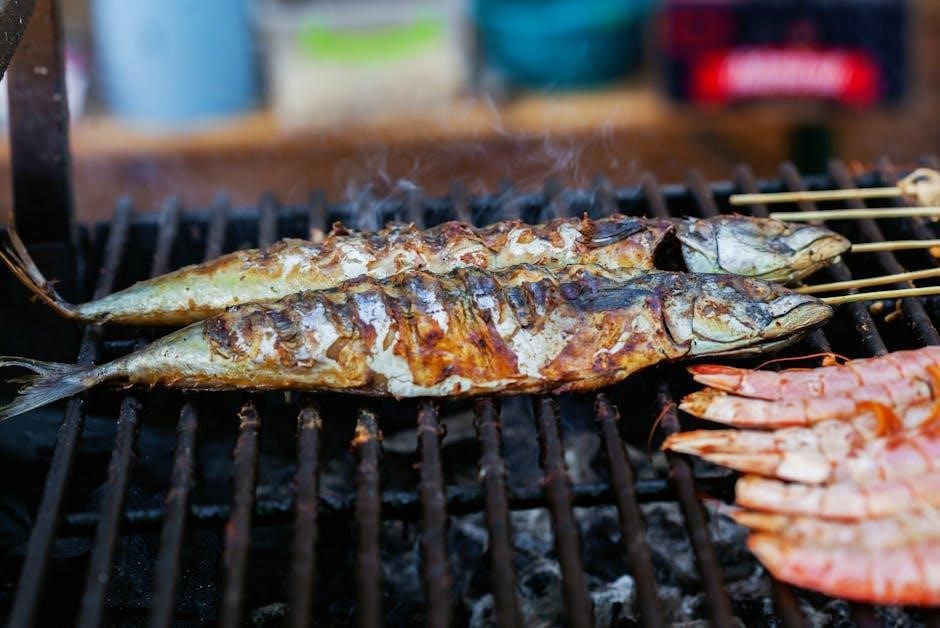
Using the Searing Side Burner
The searing side burner offers intense, direct heat, perfect for achieving a flavorful crust on steaks, chops, and vegetables. Ensure the burner is lit before adding food, and preheat it to a high temperature. Use cast iron cookware or stainless steel for optimal searing results.
Due to the high heat, monitor food closely to prevent burning. Adjust the burner control knob to maintain the desired searing temperature. This feature is ideal for quick-cooking items that benefit from a caramelized exterior.
Remember to use caution when working near the hot side burner.
Temperature Control and Monitoring
Achieving precise temperature control is key to perfect grilling. Utilize the control knobs to adjust the flame height and heat output for each burner. For lower temperatures, reduce the gas flow; for higher temperatures, increase it. Regularly check the grill’s built-in thermometer, if equipped, for accurate readings.
Experiment with different burner combinations to create zones of varying heat levels – ideal for both direct and indirect cooking. Remember that preheating is crucial for even heat distribution. Consistent monitoring ensures your food cooks to perfection.
Maintenance and Cleaning
Regular upkeep extends your Nexgrill’s life and performance! Clean grates, empty the grease trap, and inspect burners for optimal grilling results.
Cleaning the Grates
Maintaining clean grates is crucial for food quality and grill performance. After each use, allow the grates to cool slightly, then use a grill brush to remove any remaining food particles. For stubborn residue, a mixture of warm, soapy water can be applied.
Avoid abrasive cleaners that could damage the grate’s surface. Stainless steel grates benefit from specialized stainless steel cleaners. Periodically, remove the grates entirely for a more thorough cleaning – soaking them in soapy water can loosen baked-on debris. Ensure the grates are completely dry before reinstalling them to prevent rust and ensure even heat distribution during your next cookout. A clean grate promotes better searing and prevents food from sticking.
Emptying the Grease Trap
Regularly emptying the grease trap is vital for preventing flare-ups and maintaining a safe grilling environment. After each use, or when visibly full, carefully remove the grease trap or pan located beneath the grill. Dispose of the collected grease responsibly – never pour it down the drain! Allow the trap to cool before handling to avoid burns.
Consider lining the grease trap with aluminum foil for easier cleanup. Wipe down the trap with warm, soapy water after emptying. A clean grease management system minimizes fire hazards and keeps your grill operating efficiently. Neglecting this task can lead to unpleasant odors and potential grill damage, so make it a routine part of your grilling maintenance.
Burner Tube Cleaning
Maintaining clean burner tubes ensures optimal gas flow and even heating across your grill. Periodically inspect the burner tubes for any obstructions, such as debris, insect nests, or rust. Carefully remove the burners and use a pipe cleaner, wire brush, or specialized burner cleaning tool to clear any blockages in the ports.
Ensure the gas supply is completely shut off before cleaning. Gently tap the burner tubes to dislodge loose particles. Reinstall the burners securely, verifying proper alignment with the gas valves. Clean burner tubes contribute to efficient combustion, preventing uneven cooking and maximizing your grill’s performance. A thorough cleaning extends the lifespan of your burners.
Flame Tamer Inspection and Cleaning
Regularly inspect your Nexgrill’s flame tamers for excessive grease buildup, rust, or damage. These components are crucial for distributing heat evenly and preventing flare-ups by vaporizing drippings. Remove the flame tamers and scrape off any accumulated grease with a plastic scraper – avoid abrasive materials that could damage the surface.
For stubborn residue, a mild soapy water solution can be used, ensuring they are completely dry before reinstalling. Check for any cracks or warping; replace damaged flame tamers promptly. Clean flame tamers promote efficient grilling, enhance flavor, and contribute to a safer cooking experience. Proper maintenance extends their lifespan.
Long-Term Storage Instructions
Preparing your Nexgrill for long-term storage ensures its longevity and optimal performance. Begin by thoroughly cleaning the grill, removing all grease and food residue. Disconnect the propane tank and store it separately in a well-ventilated area, following all safety guidelines. Cover the grill with a protective, weather-resistant cover to shield it from the elements.
Store the grill in a dry, sheltered location, such as a garage or shed. If outdoor storage is unavoidable, elevate the grill slightly to prevent moisture damage. Periodically check the cover and grill for any signs of wear or deterioration during storage.
Troubleshooting Common Issues
Encountering problems? This section addresses frequent Nexgrill issues like lighting failures, uneven heating, flare-ups, and potential gas leaks – solutions provided!

Grill Won’t Light
Is your Nexgrill refusing to ignite? Several factors could be at play. First, ensure the propane tank is full and properly connected. Check the hose for any kinks or damage. Next, verify the igniter is functioning – listen for a clicking sound when pressed. If no click, replace the battery.
If the igniter clicks but the grill still doesn’t light, the burners might be clogged. Carefully clean the burner tubes, removing any debris. Also, inspect the flame tamers; ensure they are correctly positioned to allow proper gas flow to the burners. A blocked burner or a faulty igniter are the most common culprits. Remember safety first – disconnect the propane tank before any inspection or cleaning!
Uneven Heating
Experiencing hot spots or inconsistent temperatures across your Nexgrill? Uneven heating often stems from blocked or partially clogged burner tubes. Thoroughly clean each burner, removing any rust, debris, or insect nests that may be obstructing gas flow. Ensure the flame tamers are correctly positioned above the burners; they distribute heat evenly.
Also, check for proper gas pressure – a low supply can cause inconsistent flames. Verify the burners are receiving equal gas distribution. If problems persist, inspect the venturi tubes for blockages. A consistent, blue flame across all burners indicates optimal performance. Regular cleaning and maintenance are key to preventing uneven heating and ensuring delicious, evenly cooked food.
Flare-Ups
Dealing with sudden flames reaching high on your Nexgrill? Flare-ups are common, but excessive ones require attention. Dripping fats and food particles hitting the burners are the primary cause. Angled flame tamers vaporize these drippings, minimizing flare-ups, so ensure they’re correctly positioned and clean. Avoid cooking excessively fatty foods or trimming excess fat before grilling.
Keep the grill grates clean to prevent buildup. If flare-ups occur, move the food to a cooler zone of the grill. Never use water to extinguish flames! A controlled flare-up adds smoky flavor, but large, uncontrolled ones can damage the grill and food. Regular cleaning is crucial for prevention.
Gas Leak Detection
Safety first! Regularly check for gas leaks before each use. Create a soapy water solution (dish soap and water) and apply it to the propane tank valve connections and the gas hose. If bubbles form, do not use the grill – this indicates a leak.
Immediately turn off the propane tank valve. Tighten connections if possible, and retest. If the leak persists, replace the hose or valve. Never use a flame to check for leaks! Ensure proper ventilation when operating your Nexgrill. A gas leak is a serious hazard, so address it immediately. Prioritize safety and follow all instructions carefully.
Nexgrill Resources
Need help? Access Nexgrill’s customer support, manuals, social media channels, and warranty details online for a seamless grilling journey!
Nexgrill Customer Support
Experiencing issues with your Nexgrill? Don’t worry, assistance is readily available! Nexgrill provides comprehensive customer support to ensure your grilling experience is exceptional. While a direct phone number isn’t prominently displayed, their support is primarily accessed through online channels.
You can find helpful resources and submit inquiries through the Nexgrill website. Many common questions are addressed in their extensive FAQ section. For more personalized assistance, consider reaching out via their online contact form. Be prepared to provide your grill model number and a detailed description of the problem you’re encountering.
Nexgrill also actively engages with customers on social media platforms like Facebook, Twitter, Instagram, and YouTube, offering another avenue for support and quick responses to inquiries. Their dedicated team is committed to resolving your concerns efficiently.
Finding Nexgrill Manuals Online
Need a replacement manual or have misplaced yours? Locating Nexgrill manuals online is straightforward! Several resources offer downloadable PDFs for various Nexgrill models. The Manual Library is a valuable source, hosting documents like the “Assembly Manual_Nexgrill 5-Burner Gas Grill_720-0958A”.
A quick internet search using your specific grill model number (e.g., Gourmet Pro 6-Burner) will often lead you directly to the official Nexgrill website or authorized retailer sites offering downloadable manuals. Websites like ManualsLib and others also archive a wide range of Nexgrill documentation.
These manuals provide detailed assembly instructions, safety precautions, operating guidelines, and maintenance schedules, ensuring you can maximize your grilling experience and keep your Nexgrill in top condition.
Nexgrill Social Media Channels
Stay connected with Nexgrill and the grilling community! Nexgrill maintains an active presence across multiple social media platforms, offering inspiration, tips, and support. You can find them on Facebook, Twitter, Instagram, YouTube, Pinterest, and LinkedIn.
These channels are excellent resources for discovering new recipes, watching how-to videos, participating in grilling challenges, and getting quick answers to frequently asked questions. Follow Nexgrill to receive updates on new product releases, special promotions, and exclusive content.
Engage with fellow grilling enthusiasts, share your culinary creations, and become part of the Nexgrill family. Don’t miss out on the latest grilling trends and expert advice!
Warranty Information
Protect your investment with Nexgrill’s comprehensive warranty! Nexgrill Industries, Inc. stands behind the quality of its products, offering varying warranty periods depending on the specific model and components. Generally, the stainless steel burners are covered for an extended period, often up to 10 years.
Other parts, such as the cooking grates, flame tamers, and cart components, typically have shorter warranty durations. It’s crucial to register your grill upon purchase to activate the warranty coverage. Proof of purchase is also required for any warranty claims.
For detailed warranty information specific to your Nexgrill model, please refer to the owner’s manual or visit the Nexgrill website. Contact Nexgrill Customer Support for assistance with warranty claims or questions.