
Accu-Chek Guide Glucose Meter: A Comprehensive User Guide (Updated 02/12/2026)
Today is 02/12/2026 05:07:08. Welcome to the Accu-Chek Guide manual; this guide will expertly explain all features for optimal product use.
Welcome to a new era of diabetes management with the Accu-Chek Guide meter! This innovative device is designed to simplify blood glucose monitoring, empowering you to take control of your health with confidence. As of today, February 12th, 2026, at 05:07:08, you’re embarking on a journey towards better understanding and managing your glucose levels.
The Accu-Chek Guide isn’t just a meter; it’s a comprehensive system built around your needs. This user manual serves as your dedicated companion, providing detailed instructions and insights to maximize the benefits of your new meter. We aim to help you become proficient in utilizing all its features, ensuring accurate results and informed decision-making regarding your health. Prepare to experience a seamless and user-friendly glucose monitoring experience!
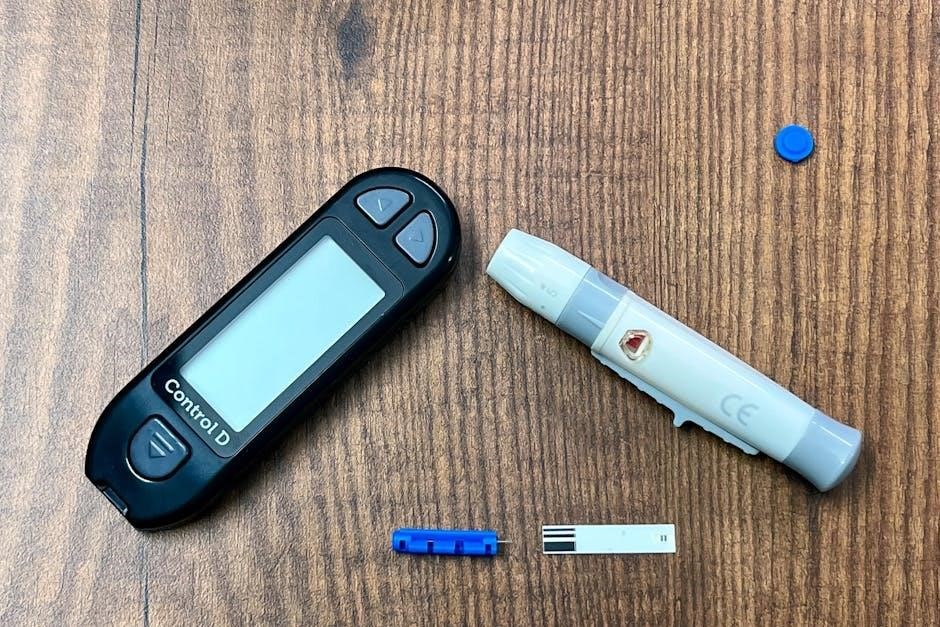
What’s Included in the Accu-Chek Guide Kit
Your Accu-Chek Guide kit is carefully assembled to provide everything you need for immediate and effective blood glucose monitoring. Inside, you’ll find the Accu-Chek Guide meter itself, a sleek and user-friendly device designed for accuracy and convenience. A lancing device is included, along with a sample of lancets for comfortable blood collection.
Furthermore, the kit contains a supply of Accu-Chek Guide test strips, essential for analyzing your blood glucose levels. A quick reference guide offers a concise overview of the meter’s functions, and a detailed user manual – like this one – provides comprehensive instructions. A logbook is also included to help you track your readings over time, aiding in effective diabetes management.
Setting Up Your Accu-Chek Guide Meter
Before you can begin testing, a few simple setup steps are required to ensure accurate readings. First, ensure your meter has sufficient battery power. Next, you’ll need to insert the microchip, which contains vital calibration data. This is a crucial step for reliable results. Following microchip insertion, setting the correct date and time is essential for accurate data logging and tracking of your glucose trends.
The meter’s intuitive interface guides you through this process. Proper setup guarantees the meter functions optimally and provides a foundation for consistent and dependable blood glucose monitoring. Refer to the following sections for detailed instructions on each step.
Inserting the Microchip
The Accu-Chek Guide meter utilizes a microchip to store personalized settings and calibration data, ensuring accurate glucose readings. Locate the microchip access port on the meter – it’s typically on the side or back. Gently align the microchip with the port, ensuring the gold contacts face the correct direction, as indicated by the meter’s diagram.
Press the microchip firmly but carefully into the port until it clicks into place. Do not force it. The meter will automatically recognize the microchip and display a confirmation message. This step is vital; without a properly inserted microchip, the meter will not function correctly.
Setting the Date and Time
Accurate date and time settings are crucial for proper data logging and tracking of your blood glucose results. To set the date and time on your Accu-Chek Guide meter, navigate to the ‘Settings’ menu using the meter’s buttons. Select the ‘Date’ and ‘Time’ options sequentially.
Use the up and down arrows to adjust the year, month, day, hour, and minute. Confirm each selection by pressing the center button. Ensure you choose the correct AM or PM designation. Proper date and time settings allow for accurate trend analysis within the Accu-Chek Connect app, aiding in effective diabetes management.
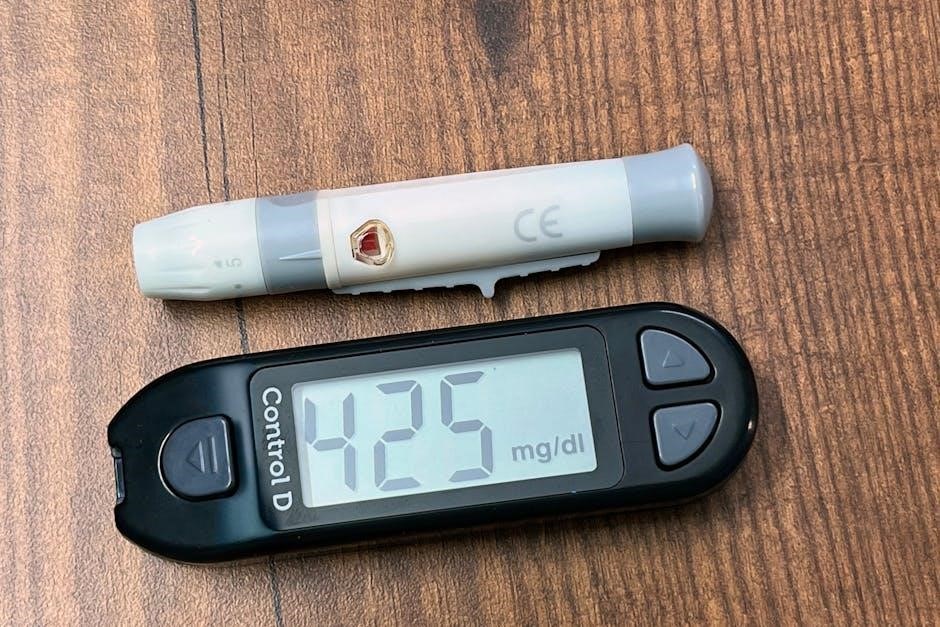
Understanding the Meter Display
The Accu-Chek Guide meter features a clear, easy-to-read display designed for quick result interpretation. The primary area shows your current blood glucose reading in mg/dL or mmol/L, depending on your chosen settings. Below the reading, you’ll find indicators for strip quality and potential error messages.
A large, illuminated icon confirms successful testing. The display also shows the time of the test and a battery level indicator. Bluetooth connectivity status is indicated by a specific icon. Familiarizing yourself with these elements ensures you can quickly and accurately understand your meter’s feedback, supporting informed diabetes management decisions.
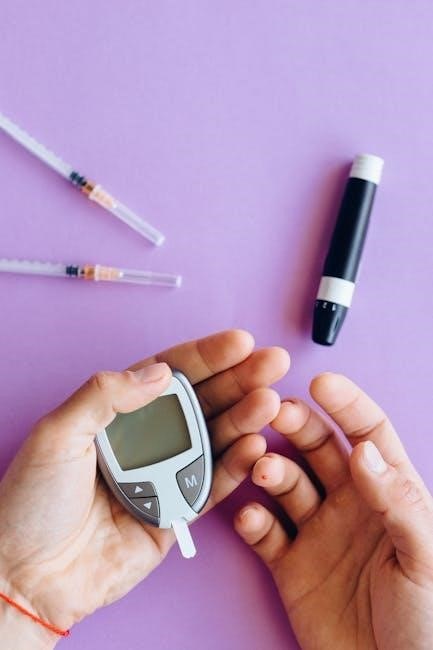
Performing a Blood Glucose Test
Performing a blood glucose test with the Accu-Chek Guide is a straightforward process. First, ensure your hands are clean and dry. Insert a test strip into the meter; it will automatically turn on. Prepare the lancing device with a fresh lancet, adjusting the depth setting as needed for a comfortable sample.
Gently prick your fingertip and apply a small drop of blood to the designated area on the test strip. The meter will begin analyzing the sample, displaying your result within seconds. Accurate technique is crucial for reliable readings, so follow the instructions carefully for optimal results.
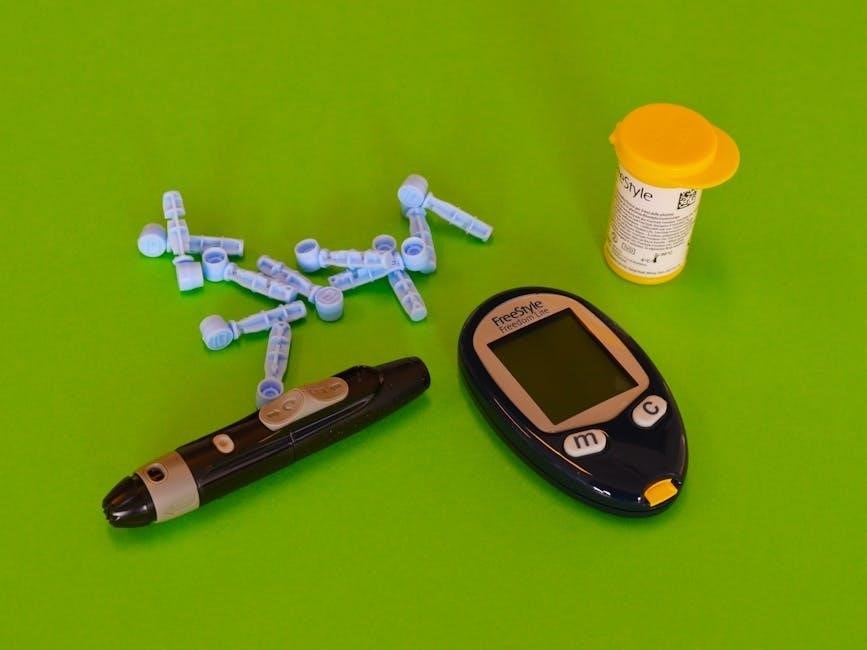
Preparing the Lancing Device
Proper preparation of the lancing device is essential for a comfortable and accurate blood sample collection. Begin by removing the cap from the device. Insert a new, sterile lancet firmly into the lancing device, ensuring it clicks into place. Twist off the protective cover of the lancet – do not reuse lancets!
Adjust the depth setting on the device according to your skin type and preference; start with a shallower setting and increase if needed. Replace the cap securely. Always use a fresh lancet for each test to maintain sterility and minimize discomfort. Proper preparation ensures a swift and efficient sampling process.
Obtaining a Blood Sample
Before obtaining a blood sample, wash your hands thoroughly with warm water and dry them completely. Select a testing site, typically on the side of a fingertip – avoid using the same spot repeatedly. Press the lancing device firmly against the chosen site and press the release button.
A small drop of blood will appear. Gently squeeze the fingertip near the puncture site to encourage blood flow, avoiding excessive squeezing which can affect accuracy. Wipe away the first drop of blood with a clean, dry cloth. A sufficient sample is crucial for reliable results; ensure a rounded drop forms.
Applying Blood to the Test Strip
Insert a new Accu-Chek Guide test strip into the meter, ensuring the chip is facing the correct direction – the meter will typically display a prompt when ready. Gently touch the rounded drop of blood to the designated sample area on the test strip.
Do not smear the blood; allow the strip to draw the sample in automatically. Insufficient blood or improper application can lead to error messages. The meter will begin counting down, indicating it’s analyzing the sample. Avoid touching the sample area after applying the blood to prevent contamination and ensure accurate readings.
Interpreting Your Blood Glucose Results
Understanding your blood glucose readings is crucial for effective diabetes management. Your Accu-Chek Guide meter displays results in milligrams per deciliter (mg/dL). Target ranges vary based on individual needs and healthcare provider recommendations, but generally, 80-130 mg/dL before a meal and less than 180 mg/dL two hours after eating are considered healthy.
Record your results and discuss them with your doctor. High or low readings require attention; consistently high levels may indicate a need for medication adjustments, while low levels necessitate immediate action to raise blood sugar.
Accu-Chek Guide Test Strip Information
Accu-Chek Guide test strips are specifically designed for use with your meter, ensuring accurate results. These strips utilize a small blood sample applied to the designated area. Proper storage is vital for maintaining strip integrity and accuracy. Always keep the test strip container tightly closed to protect against moisture and air exposure.
Avoid extreme temperatures and direct sunlight. It’s essential to check the expiration date printed on the container before each use; expired strips can yield inaccurate readings. Discard any strips past their expiration date to guarantee reliable blood glucose monitoring.
Test Strip Storage
Proper storage of your Accu-Chek Guide test strips is crucial for maintaining their accuracy and reliability. Always store the strips in their original container, ensuring the lid is tightly closed immediately after removing a strip. This protects them from humidity, temperature fluctuations, and potential contamination.
Keep the container in a cool, dry place, away from direct sunlight and extreme temperatures. Avoid storing strips in bathrooms or near sources of heat or moisture. Ideal storage temperature is between 60°F and 86°F (16°C and 30°C). Following these guidelines will help ensure accurate blood glucose readings.
Understanding Test Strip Expiration Dates
Accu-Chek Guide test strips have an expiration date printed on both the vial and the individual foil pouch. Using expired test strips can lead to inaccurate results, potentially impacting your diabetes management decisions. Never use strips past their expiration date, as the chemical reagents degrade over time, affecting their performance.
Always check the expiration date before each test. Discard any expired strips properly. Note that the expiration date is valid only when the strips have been stored correctly, as outlined in the storage guidelines. Using unexpired, but improperly stored, strips can also yield unreliable readings.
Memory Function and Data Review
The Accu-Chek Guide meter conveniently stores your blood glucose readings, allowing you to track your progress over time. This memory function typically holds up to 500 readings, providing a comprehensive history for review. You can access this data directly on the meter’s display, navigating through previous results using the meter’s buttons.
Reviewing your data helps identify patterns and trends, assisting you and your healthcare provider in making informed decisions about your diabetes management plan. The meter often displays average readings (7, 14, and 30 days) for a quick overview of your glucose control.
Troubleshooting Common Issues
Encountering issues with your Accu-Chek Guide meter is common, but often easily resolved. Error messages displayed on the screen indicate specific problems, such as insufficient blood sample or a faulty test strip. Refer to the meter’s user manual for a complete list and explanation of each code.
Inaccurate readings can stem from several causes: expired test strips, improper storage, or contamination. Ensure strips are within their expiration date and stored correctly. If problems persist, double-check your testing technique and contact Accu-Chek support for assistance. Regular maintenance helps prevent issues.
Error Messages and Their Meanings
The Accu-Chek Guide meter utilizes error codes to communicate potential problems during testing. A code indicating “Strip Error” suggests a damaged or improperly inserted test strip – ensure correct orientation and replace if needed. “Insufficient Sample” means more blood is required for an accurate reading; gently squeeze your finger until a sufficient drop forms.
Other codes, like “Meter Error,” may require contacting Accu-Chek support for further assistance. Always consult the meter’s manual for a comprehensive list of all error messages and their corresponding solutions. Understanding these codes empowers you to quickly address issues and maintain reliable glucose monitoring.
Inaccurate Readings – Potential Causes
Several factors can contribute to inaccurate blood glucose readings with the Accu-Chek Guide. Improper test strip storage – exposure to heat, humidity, or direct sunlight – can compromise their integrity. Expired test strips always yield unreliable results; check the expiration date before each use. Insufficient blood sample size is a common issue; ensure a full, rounded drop is applied to the test strip.
External factors like extreme temperatures or altitude can also influence readings. Finally, ensure your hands are clean and dry before testing, as contaminants can interfere with accuracy. Regularly check your meter’s control solution to verify proper functionality.
Maintaining Your Accu-Chek Guide Meter
Regular maintenance ensures the longevity and accuracy of your Accu-Chek Guide meter. Avoid exposing the meter to extreme temperatures or humidity. Clean the meter’s exterior regularly with a soft, slightly damp cloth – never immerse it in water. Do not use harsh cleaning agents or solvents, as these can damage the device.
Periodically inspect the test strip port for debris and gently remove any obstructions. Ensure the battery compartment is clean and free from corrosion. Following these simple steps will help maintain optimal performance and reliable results from your Accu-Chek Guide meter for years to come.
Battery Information and Replacement
The Accu-Chek Guide meter operates on standard AAA batteries. A low battery indicator will appear on the display when replacement is needed, ensuring uninterrupted testing. To replace the batteries, gently open the battery compartment located on the back of the meter. Remove the old batteries and insert new AAA batteries, ensuring correct polarity (+ and -) as indicated inside the compartment.
Always use a fresh set of batteries for optimal performance. Do not mix old and new batteries, or different battery types. Dispose of used batteries responsibly, following local regulations for battery recycling. Proper battery maintenance guarantees accurate readings.
Connectivity and Data Transfer (Bluetooth)
Your Accu-Chek Guide meter features Bluetooth connectivity, allowing seamless data transfer to compatible smartphones or tablets. This enables you to utilize the Accu-Chek Connect app for detailed analysis of your blood glucose readings. To pair your meter, ensure Bluetooth is enabled on your device and open the Accu-Chek Connect app.
Follow the on-screen instructions within the app to locate and connect to your meter. Once paired, readings will automatically sync, providing valuable insights into your glucose trends. Regular data transfer supports informed diabetes management and facilitates sharing information with your healthcare provider.
Accu-Chek Connect App Overview
The Accu-Chek Connect app is a powerful companion to your Guide meter, designed to help you understand and manage your diabetes effectively. After successful Bluetooth pairing, the app displays your blood glucose readings in a clear, easy-to-understand format. You can view trends, track your progress, and identify patterns over time.
The app also allows for personalized insights, reminders for testing, and the ability to set target ranges. Data can be conveniently shared with your healthcare professional, fostering collaborative diabetes care. Explore the app’s features to unlock a deeper understanding of your glucose control.
Cleaning and Disinfection Procedures
Maintaining a clean Accu-Chek Guide meter is crucial for accurate results and preventing infection. Regularly wipe the meter’s exterior with a slightly damp cloth, avoiding harsh chemicals or abrasive cleaners. For disinfection, use a 70% isopropyl alcohol solution on a clean cloth, ensuring no liquid enters the meter’s ports.
The lancing device should also be cleaned after each use with alcohol. Never share your lancing device with others. Always allow all components to dry completely before reassembling or using. Proper cleaning contributes to reliable readings and overall hygiene.
Disposal of Used Test Strips and Lancets
Safe disposal of used Accu-Chek Guide test strips and lancets is paramount to prevent accidental needle sticks and protect the environment. Used test strips, while not biohazardous, should be discarded in a general waste container. However, lancets are considered sharps and require careful handling.
Always use an FDA-cleared sharps container for used lancets. These containers are puncture-resistant and designed for safe disposal. Do not throw lancets into regular trash or recycling bins. Once full, follow your local regulations for sharps container disposal, often involving medical waste services.
Warranty Information
The Accu-Chek Guide meter is covered by a limited warranty against defects in materials and workmanship for a period of one year from the date of purchase. This warranty does not cover damage resulting from misuse, accidents, or unauthorized modifications. The test strips are not included in this meter’s warranty coverage.
To obtain warranty service, contact Roche Diabetes Care customer support with proof of purchase. The warranty provides for repair or replacement of the defective meter at Roche’s discretion. This warranty is non-transferable and applies only to the original purchaser. See full warranty details within the product packaging.
Frequently Asked Questions (FAQ)
Q: How often should I calibrate my Accu-Chek Guide? A: Calibration isn’t typically needed. The meter auto-codes with each strip. Q: Can I use any test strips? A: No, use only Accu-Chek Guide test strips. Q: What if my results seem inaccurate? A: Ensure proper technique, check strip expiration, and contact customer support.
Q: How do I connect to the Accu-Chek Connect app? A: Enable Bluetooth on your device and follow the app’s pairing instructions. Q: Where can I find more detailed information? A: Refer to the complete user manual or visit the Roche Diabetes Care website for support.